A simple step-by-step guide for safe and effective cleaning of your bathroom ventilation grille.
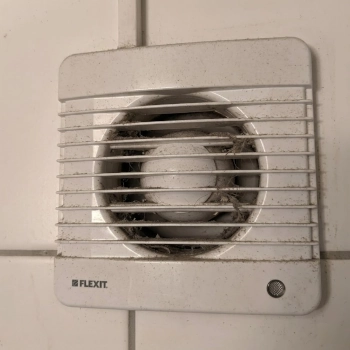
The ventilation grille in the bathroom quickly collects dust, hair, soap residue and moisture. Over time, this significantly reduces airflow, may cause unpleasant odors, and increases the risk of mold and mildew.
Proper ventilation is essential for a healthy indoor climate in rooms with high humidity. Regular cleaning helps the system operate efficiently and extends the lifespan of the fan.
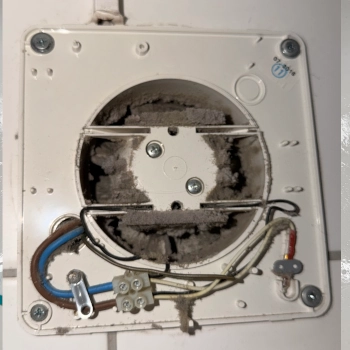
Before starting any work, make sure the fan is completely switched off. If it is directly connected to the electrical system, turn off the relevant circuit breaker in the fuse box.
Do not touch wiring or internal electrical components. If you are unsure about the installation or the ventilation system requires deeper cleaning, it is best to contact a professional.
If a thorough cleaning of the entire bathroom is needed, you may consider professional cleaning services, which also cover hard-to-reach areas.
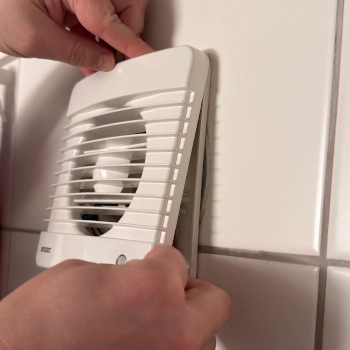
Before you begin, turn off the power to the fan. In most models, the cover is secured with plastic clips, and the key is to release the tension properly to avoid breaking anything.
To make removal easier, you first need to reduce the tension on the clips. Press on the opposite side of where you plan to detach it — for example, at the top if you intend to release the bottom edge.
As you press on the top, the cover will shift slightly, and the lower clips will loosen. At that moment, gently unclip the bottom edge.
Continue around the perimeter: press on the side opposite the area you are working on and gradually release the clips one by one.
Do not pull forcefully. If the cover does not come off, one of the clips is still under tension.
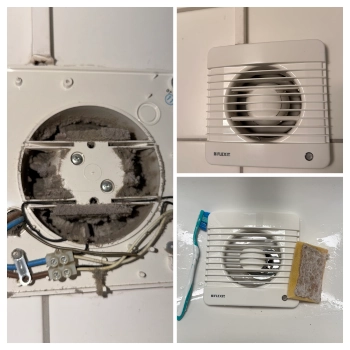
Use a vacuum cleaner with a narrow attachment or a small brush to carefully remove dust from inside the ventilation opening.
Work gently and avoid pressing on the fan blades — they can be damaged easily.
In most cases, it is enough to remove loose dust with a vacuum cleaner and wipe accessible surfaces with a slightly damp cloth. If cleaning is done regularly (approximately every 6 months), heavy buildup usually does not occur.
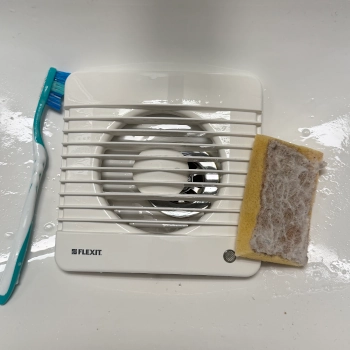
Rinse the cover in warm water with a mild cleaning solution. A toothbrush or small sponge helps clean between the slats.
Rinse thoroughly and ensure the part is completely dry before reinstalling. Moisture can damage electrical components.
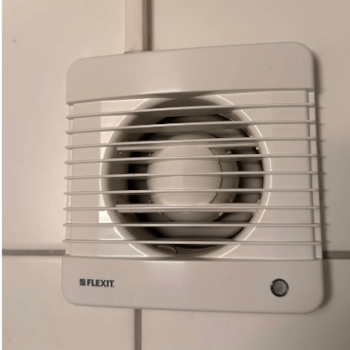
Once all parts are completely dry, reinstall the cover and switch the power back on. You should notice improved airflow, reduced noise, and faster moisture removal after showering.
It is recommended to clean it at least every 3–6 months, depending on usage and humidity levels. In high-moisture environments, more frequent maintenance may be necessary.
Regular maintenance helps prevent mold growth, improves air quality, and reduces the risk of costly repairs.
Need professional help with a thorough cleaning? FLYN AS provides both regular and one-time cleaning services, tailored to the needs of private clients and businesses.


Flyn is a legally registered cleaning company in Norway. We offer secure payments through Vipps, card and invoice.